Essential Fall Checklist for Chimney Safety
A functional chimney enhances home comfort by venting smoke and maintaining clean indoor air during cooler weather. However, neglect can turn this feature into a fire hazard or source of inefficiency. Fall provides the ideal opportunity to inspect and prepare the system before regular use begins. Follow this step-by-step checklist to ensure safe operation, improved performance, and protection against damage throughout the season.
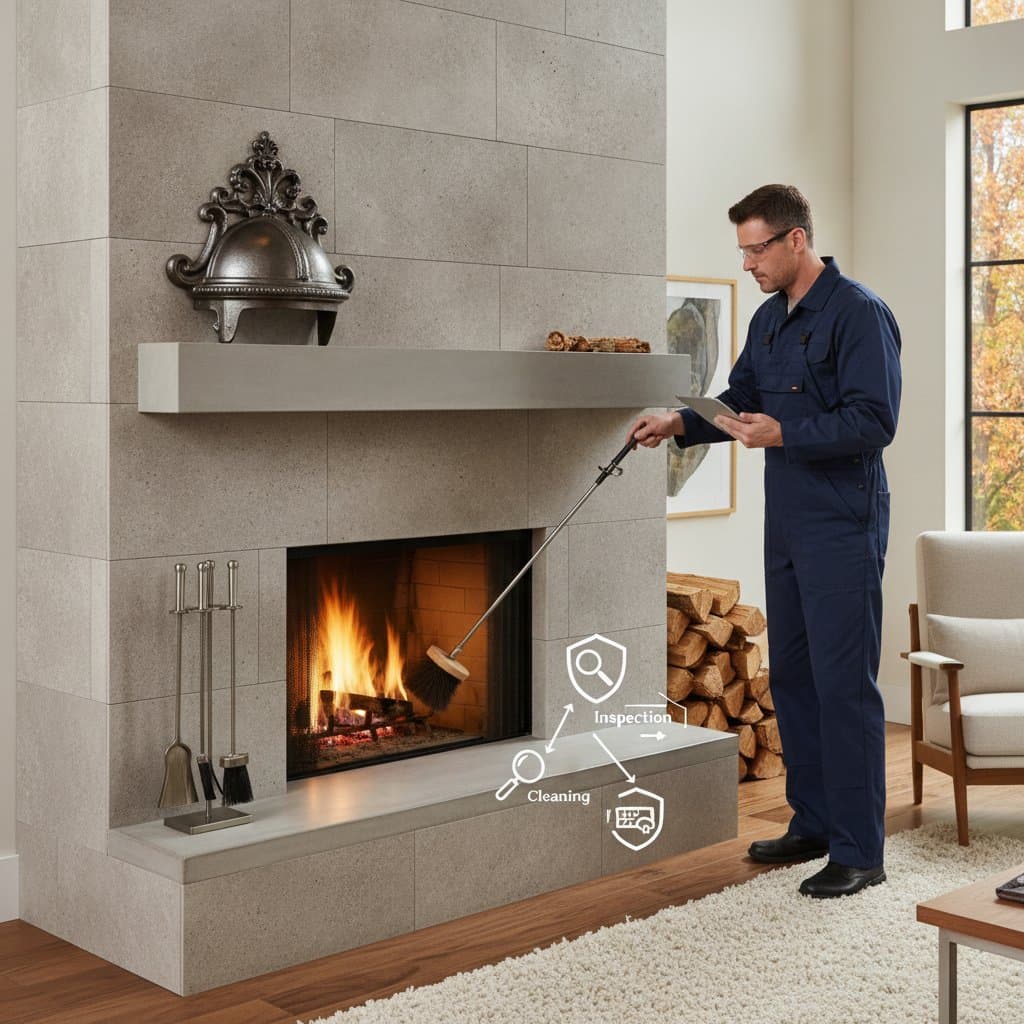
Step 1: Schedule a Professional Inspection
Homeowners must arrange an annual chimney inspection by a certified professional prior to fireplace use. Experts detect issues invisible to the untrained eye, such as internal blockages or deterioration. The National Fire Protection Association advises this routine check for every chimney, regardless of usage frequency.
Inspections occur in three levels based on needs:
- Level 1: Visual examination for creosote accumulation, obstructions, or surface damage. Select this option for unchanged systems from the prior year.
- Level 2: In-depth assessment with video camera inspections and reviews of surrounding areas like attics. Choose this after system modifications or fire incidents.
- Level 3: Comprehensive structural analysis, potentially involving disassembly. Pursue this for suspected severe damage or hazards.
Costs range from 100 to 400 dollars, varying by inspection depth and region. Such proactive measures far outweigh the financial burden of fire repairs or liner replacements.
Step 2: Remove Creosote Buildup
Creosote, a tar-like residue from wood smoke, accumulates inside the flue and poses a primary fire risk. Professional cleaning eliminates this flammable deposit, which ignites easily at high temperatures. Schedule sweeps annually or after burning 1.5 cords of wood to maintain clear passages.
During cleaning, technicians use brushes and vacuums to scrape and remove layers. Homeowners should avoid DIY methods, as improper tools can damage the flue. Post-cleaning, the chimney regains optimal draft, reducing smoke backflow and enhancing burn efficiency.
Step 3: Check the Chimney Cap and Crown
The chimney cap shields the flue from rainwater, wildlife, and falling debris while containing embers. Damage or absence invites moisture intrusion, animal infestations, or roof fires from stray sparks.
Examine the cap for corrosion, fractures, or insecure attachments. Opt for durable stainless steel or copper models over galvanized versions for better weather resistance. Verify the screen mesh remains secure. Replacements cost 100 to 500 dollars, influenced by dimensions and materials, and help preserve chimney longevity by excluding water.
The crown, a sloped concrete or mortar topper, directs water away from the structure. Scan for fissures or spalls. Seal minor imperfections with masonry-specific waterproofing products. Professionals repair significant cracks to halt water penetration into bricks and mortar.
Step 4: Examine the Chimney Structure and Masonry
Chimney masonry withstands weather exposure but deteriorates over time, leading to leaks or collapses. Inspect bricks, mortar joints, and flashing around the roof penetration for cracks, spalling, or erosion.
Use a ladder for exterior views and binoculars for height. Tuckpoint loose mortar with a matching compound if gaps appear. Address tuckpointing early to prevent expansive water damage during freezes.
For interior checks, look inside the firebox for soot stains or efflorescence, signs of moisture. Hire masons for rebuilds if structural integrity falters, as neglected masonry accelerates flue corrosion and fire risks.
Step 5: Inspect and Test the Damper
The damper regulates airflow, opening for fires and sealing the flue otherwise to conserve energy and block drafts. Malfunctioning units permit heat loss or introduce outdoor elements.
Test functionality by operating the handle with a flashlight illuminating the throat. Ensure smooth movement without rust, residue, or obstructions. Clean buildup with a stiff brush and apply high-heat silicone lubricant to hinges.
Replace warped or broken dampers, which cost 200 to 600 dollars. Consider top-sealing models that close from above, offering superior protection against precipitation and pests while optimizing heat retention.
Step 6: Inspect the Flue Liner
The flue liner contains combustion byproducts and directs them outdoors, preventing toxic leaks into living spaces. Cracks or collapses compromise safety and efficiency.
Professionals use cameras to evaluate liner condition during inspections. Clay tiles may crack from thermal stress, while metal liners corrode from acidic creosote. Repair or reline deteriorated sections promptly to avoid carbon monoxide hazards.
Liner maintenance extends chimney life and ensures proper venting. Costs for relining vary from 1,000 to 4,000 dollars, but they prevent far greater expenses from health risks or structural failures.
Step 7: Test Smoke and Carbon Monoxide Detectors
Reliable detectors provide critical alerts for fireplace-related dangers. Smoke detectors identify fire outbreaks, while carbon monoxide units detect invisible, lethal gases from incomplete combustion.
Press test buttons on each device to confirm audible alarms. Swap batteries biannually or at chirp signals. Upgrade units over 10 years old to models with long-life sealed batteries.
Position detectors strategically: one near the fireplace, others in bedroom paths, and at least one per floor level. These placements maximize early warnings, potentially saving lives during malfunctions.
Step 8: Prepare Firewood and Storage
Quality firewood influences burn cleanliness and heat production. Select hardwoods such as oak, maple, or hickory, which ignite less creosote than resinous softwoods like pine.
Use wood seasoned for a minimum of six months, with moisture below 20 percent. Test dryness by striking logs; a sharp crackle indicates readiness, versus a muffled tone for wet pieces.
Elevate storage on racks away from the ground, positioning stacks five feet from the house to deter pests. Tarp only the top, allowing side airflow to promote drying. Proper practices minimize creosote and insect issues.
Step 9: Assess Ventilation and Draft
Effective draft pulls smoke upward, averting room fill and backdrafts. Test by igniting twisted newspaper at the damper; smoke must ascend swiftly into the flue.
If smoke lingers, suspect blockages or pressure imbalances from tight home sealing. Crack a window to equalize air, or call experts for draft measurements and adjustments like flue extensions or fans.
Optimized ventilation boosts safety and warmth distribution. Regular assessments prevent inefficient burns that waste fuel and heighten pollution risks.
Step 10: Apply Waterproofing and Exterior Maintenance
Exterior protection guards against freeze-thaw cycles that crack materials. Clean the chimney face of debris and apply breathable sealants to bricks and mortar.
Focus on the chase cover if present, ensuring tight seals around pipes. Repaint metal components with heat-resistant coatings to combat rust.
Annual upkeep preserves appearance and function. These efforts reduce repair needs, ensuring the chimney withstands seasonal rigors.
Safeguard Your Home for Cozy Winters
Implementing this fall checklist transforms potential risks into reliable comfort. Professional and personal actions alike fortify your chimney against fires, leaks, and inefficiencies. Enjoy worry-free firesides, knowing your home remains protected through the coldest months.