The Pre-Season AC Checklist That Saves You Money in 2025
A hot summer arrives faster than expected, and no homeowner desires an air conditioner that struggles during peak demand. A pre-season AC tune-up represents the most effective strategy to avoid expensive repairs, reduce energy bills, and maintain comfort throughout the season. Most tasks require completion before the initial heatwave, which provides peace of mind and optimal performance when temperatures rise.
Why a Pre-Season Check Matters
Air conditioners experience a 5 to 10 percent efficiency loss annually without regular maintenance. Accumulation of dirt, clogged filters, and insufficient refrigerant compel the system to operate more strenuously, which increases electricity consumption and reduces equipment longevity. Adherence to a straightforward pre-season checklist addresses these concerns and controls cooling expenses effectively.
Step 1: Clean or Replace the Air Filter
A soiled air filter constitutes the primary cause of diminished cooling efficiency. It impedes airflow, overworks the blower motor, and risks coil freezing.
What to Do
- Deactivate power to the system via the breaker panel.
- Extract the existing filter from the return air vent or furnace enclosure.
- Note the dimensions indicated on the filter frame, such as 16x25x1 or 20x30x1 inches.
- Install a new disposable filter every one to three months. For reusable filters, cleanse with mild soap and water, then allow complete drying prior to reinstallation.
Pro Tip: Select filters with MERV ratings of 8 to 11 to achieve an ideal equilibrium between airflow and particle capture. Ratings above this range enhance indoor air quality yet potentially restrict airflow in systems not engineered for them.
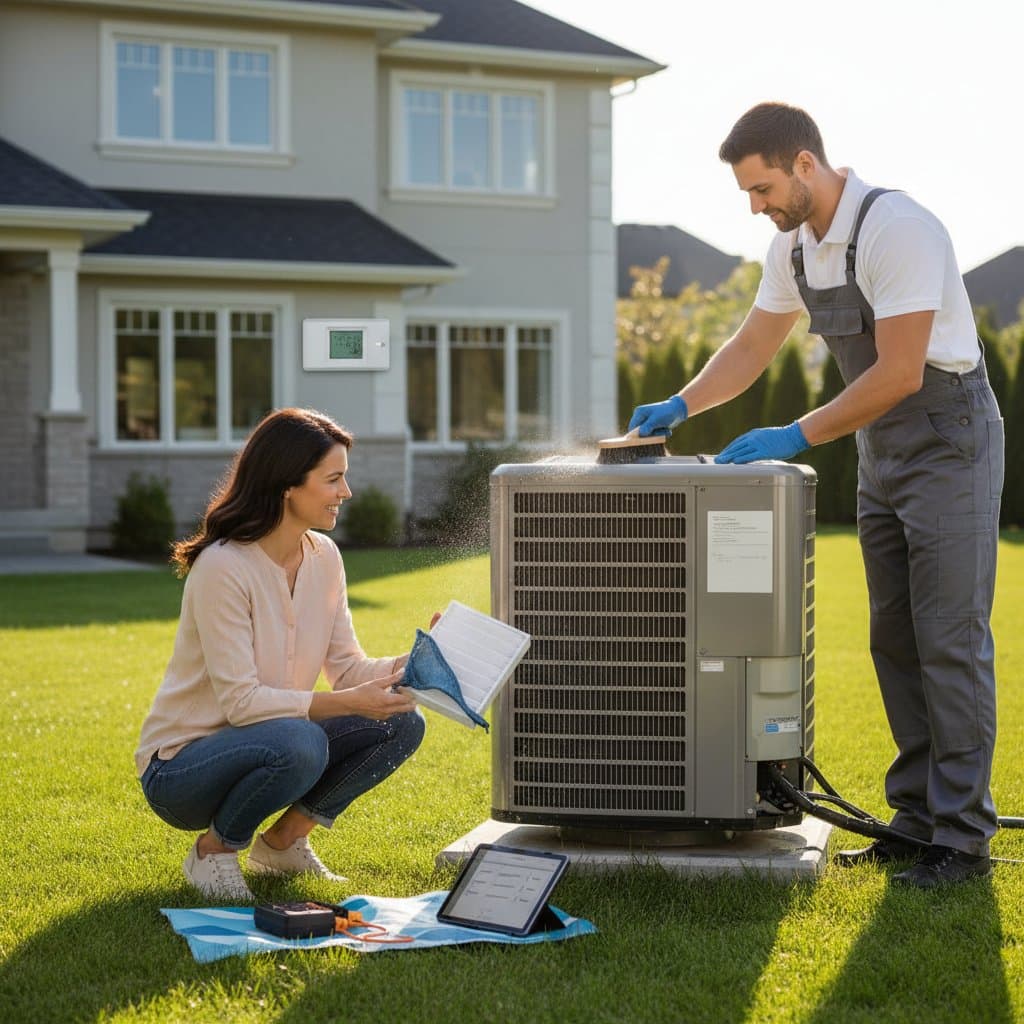
Step 2: Clear the Outdoor Unit
The condenser unit performs optimally with unobstructed airflow. Vegetation trimmings, foliage, and accumulated debris obstruct the fins and compromise efficiency.
Cleaning Steps
- Disconnect power at the unit's disconnect box.
- Eliminate debris with a soft-bristled brush or a vacuum equipped with a brush attachment.
- Maintain a minimum 24-inch clearance surrounding the unit.
- Prune adjacent shrubs or vegetation to preserve airflow.
- Rinse the fins gently from the exterior inward using a hose, while avoiding high-pressure streams that might deform the metal components.
In cases of bent fins, employ a fin comb for straightening. These tools prove affordable and swiftly reinstate adequate airflow.
Step 3: Inspect the Condensate Drain
The condensate drain expels moisture gathered from the atmosphere. Blockages lead to water accumulation within the home or activation of a safety shutoff mechanism.
Quick Maintenance
- Identify the PVC drain line adjacent to the indoor unit.
- Introduce a solution of one cup white vinegar combined with one cup warm water into the line.
- Allow 30 minutes for the mixture to act, followed by a flush with plain water.
- Address substantial obstructions by applying a wet-dry vacuum to the exterior drain port.
A unobstructed drain ensures safe system function and eliminates unpleasant odors.
Step 4: Check Thermostat Settings
The thermostat serves as the central control for the cooling system. Improper configurations or depleted batteries result in inconsistent temperatures and unnecessary energy expenditure.
Key Settings
- Configure the thermostat to cool mode.
- Establish a temperature setting near 78 degrees Fahrenheit for balanced comfort and efficiency.
- Renew batteries annually in models that utilize them.
- For programmable or smart thermostats, examine and adjust seasonal schedules in advance.
Energy Fact: Each degree increase above 72 degrees Fahrenheit yields approximately 3 percent savings on cooling expenses.
Step 5: Inspect Ductwork and Vents
Duct leaks dissipate up to 20 percent of cooled air, particularly in attics or crawl spaces.
What to Check
- Examine for separated joints or openings at duct-to-vent connections.
- Secure minor leaks using foil tape, avoiding ordinary cloth duct tape.
- Vacuum registers and vents to dislodge dust accumulation.
- Confirm that all vents remain open and free from obstructions like furniture or carpeting.
Suspected extensive leaks warrant a professional duct integrity assessment to pinpoint issues and elevate system performance.
Step 6: Test System Performance
After verifying cleanliness and connectivity, conduct a performance evaluation.
- Reactivate power to the system.
- Lower the thermostat setting by several degrees below the ambient room temperature.
- Monitor for steady operation devoid of rattling or grinding sounds.
- Verify uniform cool air delivery from every vent.
Short cycling or failure to achieve set temperatures indicates the need for expert intervention, possibly including refrigerant evaluation.
Common Mistakes to Avoid
- Neglecting filter maintenance: A moderately soiled filter elevates energy consumption by as much as 15 percent.
- Overlooking minor sounds: Rattling or humming often denotes loose parts or electrical faults.
- Enclosing the outdoor unit during use: Such coverings hinder airflow and retain heat.
- Attempting refrigerant addition: Licensed professionals alone manage refrigerant in compliance with safety and environmental standards.
When to Call a Professional
Homeowners manage basic cleaning and inspections adeptly, yet annual expert service proves essential. Technicians perform comprehensive tasks including:
- Refrigerant level and pressure measurements.
- Examination of electrical connections for deterioration or damage.
- Assessment of coil temperatures and airflow metrics.
- Lubrication of mechanical components to minimize wear.
- Calibration of thermostat precision.
Accessibility and Safety Considerations
Accessing the air handler in an attic or crawl space demands secure footing and adequate illumination. Employ a portable LED work light and don protective gloves to guard against jagged metal surfaces.
Implement the Checklist for Lasting Benefits
Executing this AC checklist at the appropriate time distinguishes a reliable, comfortable residence from an untimely summer failure. Complete these steps prior to rising temperatures to prolong equipment durability and achieve tangible energy savings. Maintain regular filter replacements, ensure outdoor unit accessibility, and arrange yearly professional inspections.


