Key Steps to Prepare Your Air Conditioner for Summer Heat
As temperatures climb, the air conditioner emerges as a vital component of home comfort. Downtime during peak heat proves uncomfortable, and emergency repairs escalate expenses. Early preparation conserves funds, averts failures, and enhances operational efficiency throughout the season.
This guide details essential procedures to ready the air conditioner. It incorporates safety precautions, cleaning techniques, and diagnostic evaluations suitable for homeowners, with guidance on when to engage professionals. Employ this comprehensive AC maintenance checklist to sustain consistent cooling without interruption.
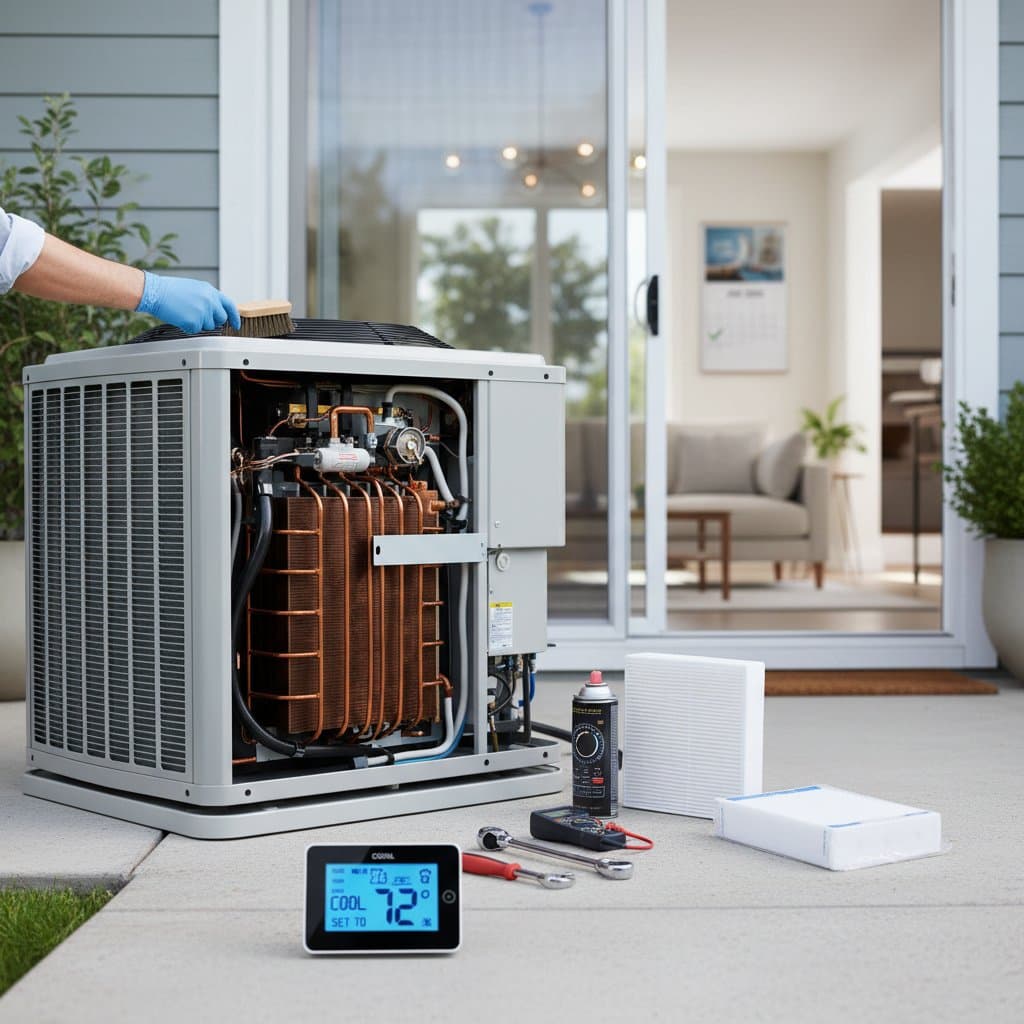
Step 1: Inspect Outdoor Components
The outdoor unit endures exposure to elements, accumulating dirt and obstructions over time. Initiate the process by disconnecting power via the nearby switch or the main electrical panel to ensure safety.
Complete these exterior tasks:
- Clean the coil fins with a soft brush or low-pressure hose spray to dislodge dust and foliage. Avoid high pressure, which may deform the delicate fins.
- Maintain clearance by trimming vegetation and grass to at least two feet from the unit. Unrestricted airflow facilitates effective heat dissipation.
- Examine fan blades for damage such as chips or fractures. Damaged components cause vibrations and excessive noise, necessitating replacement.
- Verify insulation on the refrigerant lines. Intact foam covering on copper tubing preserves energy efficiency; repair or replace deteriorated areas promptly.
Capture an image of the unit prior to cleaning. This record aids in spotting anomalies during future assessments or technician visits.
Step 2: Replace or Clean the Air Filter
The air filter captures particles that could impair system performance. A clogged filter restricts airflow, strains the motor, and diminishes cooling effectiveness.
Follow these steps:
- Locate the filter in the return air duct, furnace, or air handler compartment.
- Remove the old filter and inspect its condition; replace it if soiled.
- Select a filter with a MERV rating appropriate for your system, typically 8 to 13 for residential use.
- Install the new filter with the arrow pointing toward airflow direction.
Perform this task monthly, especially in dusty environments or homes with pets. Cleanable filters require washing and thorough drying before reinstallation.
Step 3: Check Air Vents and Ductwork
Obstructions in vents or leaks in ducts compromise cooling distribution. Inspect all rooms to confirm vents remain open and free from furniture or drapery blockages.
Apply these duct maintenance practices:
- Illuminate vent interiors with a flashlight to detect dust accumulation.
- Vacuum grille covers using a brush attachment on your vacuum cleaner.
- Examine accessible duct joints in attics or basements for separations.
- Secure any gaps with specialized HVAC foil tape, avoiding ordinary adhesive varieties.
Persistent issues like inconsistent room temperatures or reduced airflow warrant a professional duct evaluation. Research indicates duct leaks may squander up to 20 percent of cooled air, inflating energy consumption.
Step 4: Clean the Indoor Evaporator Coil
The evaporator coil, situated inside the unit, absorbs indoor heat but collects grime that hampers heat transfer. Neglect leads to reduced efficiency and potential coil freezing.
Proceed with caution:
- Access the coil through the air handler panel after powering off the system.
- Gently vacuum loose debris from the coil surface.
- Apply a no-rinse coil cleaner spray, following product instructions for even coverage.
- Allow the cleaner to evaporate fully before restoring power.
Homeowners with limited experience should consult a technician for this step to prevent damage. Annual cleaning sustains optimal performance and extends equipment lifespan.
Step 5: Flush the Condensate Drain Line
Humidity removal by the air conditioner generates condensate that exits via a drain line. Blockages invite water overflow, fostering mold and structural harm.
Execute this cleaning procedure:
- Identify the drain line adjacent to the indoor air handler.
- Attach a wet-dry vacuum to the exterior end to extract obstructions.
- Introduce a cup of white vinegar at the evaporator coil access tee to eliminate algae buildup.
- After a brief dwell time, rinse with warm water to clear residues.
Repeat this maintenance every two months during operation. A clear drain prevents odors and safeguards indoor air quality.
Visual Aid Suggestion: Include a diagram illustrating the condensate drain path and typical blockage sites for enhanced understanding.
Step 6: Test the Thermostat and Controls
The thermostat regulates system cycles, and inaccuracies lead to overworking or insufficient cooling. Verify functionality to ensure precise temperature management.
Conduct these tests:
- Set the thermostat to cool mode and lower the temperature below room level.
- Listen for the unit activating and feel for cool air from vents within minutes.
- Check batteries in battery-powered models and replace if low.
- Calibrate digital thermostats against a separate thermometer if readings differ.
Upgrade to a programmable or smart thermostat for automated adjustments that optimize energy use. Accurate controls prevent unnecessary runtime and utility spikes.
Step 7: Review Refrigerant Levels and Coils
Insufficient refrigerant indicates possible leaks, impairing cooling while increasing electricity demands. Homeowners lack the tools to recharge, but recognizing symptoms proves valuable.
Monitor for these indicators:
- Frost formation on refrigerant lines.
- Unusual hissing from the compressor area.
- Vents emitting warm air despite system operation.
Engage a certified technician to assess pressure levels and detect leaks. Routine inspections shield the compressor from strain during intense usage periods.
Step 8: Inspect Electrical Components
Wiring and connections degrade over time, posing risks of shorts or failures. A thorough visual check identifies issues before they escalate.
Perform this evaluation:
- With power disconnected, examine wires for fraying or corrosion.
- Tighten loose terminals on the unit's control board.
- Inspect capacitors for bulging or leakage signs.
- Verify grounding connections remain secure.
Electrical work demands caution; defer complex repairs to professionals. Sound electrical integrity supports safe, reliable operation.
Step 9: Plan Energy-Saving Upgrades
Aging air conditioners consume excess power; targeted enhancements yield substantial savings. Evaluate your setup for opportunities to improve efficiency.
Consider these modifications:
- Enhance attic insulation or add radiant barriers to minimize heat gain.
- Incorporate ceiling fans to distribute air evenly, allowing higher thermostat settings.
- Apply thermal curtains or solar window films to reduce solar heat entry.
- Transition to a unit with superior SEER rating upon replacement.
Such interventions lower cooling expenses by 15 to 40 percent, varying by home configuration and regional climate. Prioritize upgrades based on your system's age and performance history.
Step 10: Establish a Maintenance Schedule
Consistent upkeep ensures long-term reliability. Develop a structured plan encompassing routine tasks to integrate seamlessly into household routines.
Utilize this sample timetable:
| Task | Frequency | Notes |
|---|---|---|
| Replace air filter | Every 30 days | Increase frequency with pets or allergies |
| Clean outdoor coil | Twice per season | Employ low water pressure |
| Flush drain line | Every 2 months | Incorporate vinegar and warm water |
| Check thermostat | Start and mid-season | Renew batteries annually |
| Professional tune-up | Once per year | Schedule prior to heat peak |
Set digital reminders or calendar alerts to maintain adherence. Proactive scheduling minimizes surprises and maximizes comfort.
Sustain Cooling Comfort Year-Round
Implementing this AC maintenance checklist fortifies your system against summer demands. Regular attention not only curbs repair costs but also promotes energy conservation and indoor well-being. Initiate these steps now to enjoy uninterrupted relief from the heat.