
The 2025 Checklist to Prevent Attic Mold Damage
A damp attic can silently undermine a home's structure well before signs become visible. Mold flourishes in environments where warm air encounters trapped moisture, making the attic an ideal habitat. Prevention extends beyond mere cleanliness; it involves safeguarding the roof, insulation, and indoor air quality. This checklist outlines proven strategies that homeowners can implement to maintain a mold-free attic.
Why Attic Mold Develops
Attic mold emerges when moisture builds up faster than it dissipates. Key triggers include inadequate ventilation, roof leaks, and improper insulation placement. Warm air from occupied areas ascends, carrying humidity into the attic. Without effective venting, this leads to condensation on roof sheathing and rafters. Persistent wetness fosters mold proliferation on wooden elements and insulation materials.
A minor mold patch often signals broader ventilation deficiencies impacting the whole house. Spores disperse via heating and cooling systems, compromising air quality and possibly causing allergic reactions or breathing difficulties. Recognizing these hazards forms the foundation of effective prevention.
Core Prevention Strategies
Effective mold prevention requires regulating airflow, temperature, and humidity levels. Focus on these fundamental actions:
- Ensure balanced attic ventilation through adequate intake and exhaust vents.
- Seal ceiling penetrations to block warm air infiltration.
- Apply insulation properly to minimize condensation risks.
- Inspect and repair roof flashing and gutters regularly.
- Monitor humidity to keep it under 50 percent with a hygrometer.
- Perform biannual inspections for leaks and early mold indicators.
These measures provide a strong base; the following sections detail implementation.
Step 1: Evaluate and Enhance Ventilation
Assessing Existing Ventilation
Begin by examining attic airflow patterns. The National Roofing Contractors Association advises one square foot of net free ventilation area, combining intake and exhaust, per 300 square feet of attic floor space when a vapor barrier exists. Without a barrier, the ratio shifts to one square foot per 150 square feet. For a 900-square-foot attic, this equates to a minimum of three square feet of total vent area.
Adding or Upgrading Vents
Optimal ventilation draws cool air in via soffit vents and expels it through ridge or gable vents. Verify that all vents remain free of obstructions. If insulation impedes soffit vents, install baffles to preserve clear pathways. Ridge vents perform best when spanning the full roof length for uniform circulation. In structures lacking ridge vents, add gable vents or turbine units to boost air movement.
Ventilation Pitfalls to Avoid
- Relying solely on exhaust vents without corresponding intake, which hampers overall flow.
- Allowing insulation to cover soffit vents.
- Operating powered fans without sufficient intake, potentially drawing conditioned air from below.
Balanced ventilation dissipates hot, humid air efficiently and aligns attic temperatures with exterior conditions.
Step 2: Identify and Mitigate Moisture Origins
Sealing Infiltration Points
Warm air penetrates through fissures near light fixtures, exhaust fans, and access hatches. Apply expandable foam or caulk to close these gaps, and add weatherstripping to attic doors. An unsealed hatch may permit air leakage equivalent to a small window left ajar throughout the year.
Directing Exhaust from Wet Areas
Ensure bathroom and kitchen exhaust fans discharge outdoors, never into the attic space. Employ short, insulated flexible ducts to avoid internal condensation. Inspect roof cap connections for tightness and clear any obstructions.
Repairing Roof Imperfections
Examine roof decking and rafters for discoloration or softness from water exposure. Minor leaks at flashing or vent surrounds can sustain mold. Confirm that flashing overlaps shingles correctly and remains sealed. Address any damaged or absent shingles without delay.
Step 3: Insulate to Stabilize Temperature and Humidity
Selecting Appropriate Insulation
Common options encompass fiberglass batts, blown-in cellulose, and spray foam. Determine the suitable R-value based on your regional climate; R-38 to R-60 typically suffices for thermal performance. Proper insulation stabilizes attic temperatures, curbing condensation on cooler surfaces.
Correct Installation Practices
- Maintain at least one inch of clearance between insulation and soffit vents for air passage.
- Install baffles to separate roof sheathing from insulation layers.
- Prevent compression of insulation materials, as it diminishes their insulating capacity.
For areas over recessed lighting, select IC-rated fixtures or add protective shields prior to insulating.
Insulation Errors to Sidestep
- Excessive insulation that obstructs air channels.
- Gaps along joists or in remote areas.
- Neglecting vapor barriers to manage moisture transfer.
Well-placed insulation promotes dryness and enhances energy conservation.
Step 4: Regulate Humidity Precisely
Tracking Humidity Variations
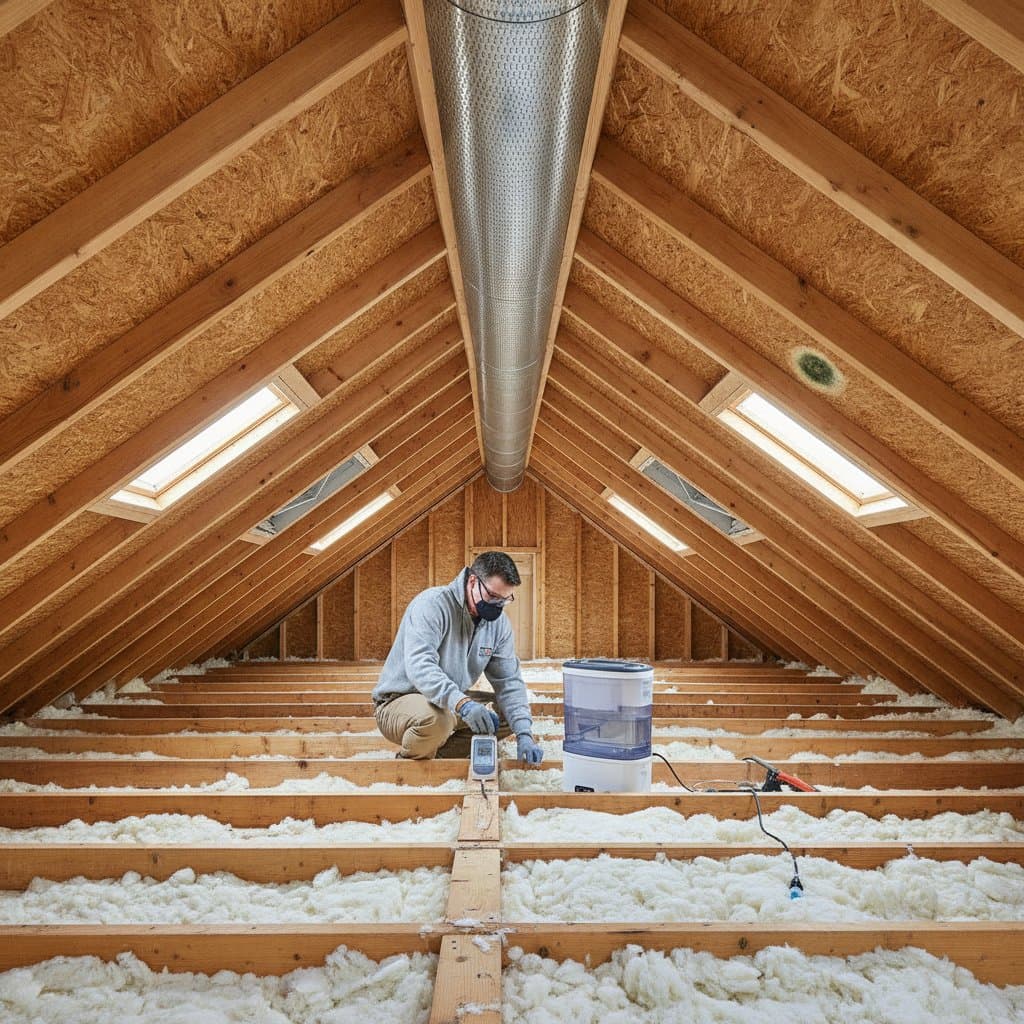
Deploy a digital hygrometer to gauge attic humidity. Target 30 to 50 percent for optimal conditions. Exceedances above 60 percent heighten mold susceptibility. Measure at various times to detect ventilation shortcomings through daily swings.
Incorporating Dehumidification
In high-humidity regions or poorly ventilated attics, install a unit sized for 800 to 1200 square feet. Opt for models with automatic shutoff and drain hoses for minimal upkeep. Place the device near the entry point for convenient oversight.
Adapting to Seasonal Changes
Winter frost forms when indoor warmth contacts chilled roof elements; inspect for buildup on nails or sheathing post-cold spells. Summer brings risks of odors or soggy insulation; evaluate accordingly. Modify ventilation settings to match weather patterns.
Step 5: Perform Regular Assessments
Inspection Protocol
Access the attic biannually with a flashlight to scan for:
- Darkened or stained timber, particularly at roof connections.
- Soggy or settled insulation.
- Moisture marks or corrosion on fasteners.
- Beads of condensation on pipes or decking.
A moisture meter proves useful for wood; levels over 20 percent suggest mold-friendly environments.
Post-Event Reviews
Following intense precipitation or snowfall, verify for intrusion. Ice dams may force water beneath shingles. Confirm dryness persists through adverse conditions.
Engaging Experts
Consult a certified inspector or mold specialist if findings seem ambiguous. They can analyze air and moisture to determine remediation needs.
Step 6: Implement Ongoing Maintenance
Maintaining Gutters and Roof
Blocked gutters channel water toward shingles or soffits. Clear them biannually and position downspouts to divert flow six feet from the base. Ensure valleys and flashing stay debris-free.
Smart Storage Choices
Steer clear of cardboard or textiles near outer walls, as they retain dampness and promote mold. Substitute with sealed plastic containers.
Applying Protective Finishes
For attics with prior mold, apply fungicidal primers or coatings to rafters and sheathing post-cleanup. These inhibit recurrence.
Step 7: Recognize Limits of DIY Efforts
Routine checks and basic fixes suit most homeowners, yet complex problems demand professionals. Seek assistance for:
- Lingering musty smells post-cleaning.
- Mold patches exceeding 10 square feet.
- Rot in structural wood or drooping rafters.
- Persistent dampness after enhancements.
Remediation expenses range from $500 to $3000, influenced by scope and scale. Proactive steps often limit costs.
Prioritizing Safety in Access
Attics often feature cramped or irregular layouts. Equip yourself with gloves, a dust mask, and eye protection. Secure a sturdy ladder and step only on joists to avoid insulation. Those with mobility challenges should schedule professional visits biannually.
Pitfalls That Foster Mold
- Dismissing small leaks, which accumulate significant harm.
- Obstructing vents with insulation.
- Neglecting routine checks, allowing rapid mold expansion.
- Inadequate sealing of living space breaches.
- Faulty exhaust routing from humid rooms.
Circumventing these preserves moisture balance and prolongs roof integrity.
Resource Allocation Overview
| Task | DIY Level | Estimated Cost | Recommended Frequency |
|---|---|---|---|
| Gutter maintenance | Simple | $0 to $150 | Biannual |
| Vent evaluation | Intermediate | $0 to $200 | Biannual |
| Insulation refresh | Intermediate | $500 to $2000 | Decennial |
| Roof repairs | Expert | $150 to $1000 | As required |
| Mold treatment | Expert | $500 to $3000 | As required |
Prevention investments pale against expenses for structural fixes or insulation replacement.
Building Lasting Protection
Sustaining a mold-free attic demands steady vigilance rather than elaborate overhauls. By directing airflow, closing leaks, and tracking humidity, you eliminate mold's prerequisites. View the attic as integral to your home's respiratory health; equilibrium ensures a robust roof and purer interior air.
Initiate action promptly: inspect vents, probe for leaks, and log humidity readings. Integrate these into your yearly upkeep schedule for enduring results.