Attic Mold Prevention Begins With Moisture Control
Attic mold develops when warm indoor air meets cold roof surfaces and condenses into water droplets. This moisture creates ideal conditions for mold growth on wood, insulation, and other organic materials. The process starts long before visible mold appears, often triggered by small leaks or ventilation failures that homeowners overlook.
Understanding how moisture enters the attic helps homeowners address the root cause rather than treating symptoms. Early intervention prevents expensive structural repairs and protects indoor air quality throughout the home.
Common Moisture Sources in Attics
Several specific conditions allow moisture to accumulate in attic spaces. Bathroom exhaust fans that vent into the attic instead of outdoors create concentrated humidity near the roof deck. Kitchen range hoods with improper ductwork produce similar problems during cooking activities.
Ceiling penetrations around recessed lights, plumbing pipes, and electrical wiring allow conditioned air to escape into the attic. This air carries moisture that condenses when it contacts cold roof sheathing. Damaged roof flashing around chimneys and skylights permits rainwater to enter during storms.
Blocked soffit vents prevent fresh air from entering the attic space. When intake vents become clogged with insulation, leaves, or debris, the entire ventilation system fails to function properly. Ridge vents and gable vents cannot exhaust moist air without adequate intake from below.
High indoor humidity levels compound these problems. Homes with poor moisture control in living spaces push humid air upward through ceiling gaps and electrical outlets. A humidity monitor placed in the living area can reveal patterns that contribute to attic moisture issues.
Warning Signs That Require Attention
Several visible indicators suggest moisture problems exist in the attic. Dark staining on roof sheathing or rafters indicates water has been present for extended periods. Clumped or discolored insulation near exterior walls often signals condensation issues.
Rusty nails and metal fasteners show that humidity levels have remained elevated long enough to cause corrosion. A persistent musty odor, especially noticeable when entering the attic, indicates active mold growth somewhere in the space.
Damp roof sheathing that feels soft when pressed suggests structural damage may already be occurring. Water stains on ceiling drywall below the attic often appear after moisture has saturated insulation and begun affecting living spaces.
Safe Inspection Procedures
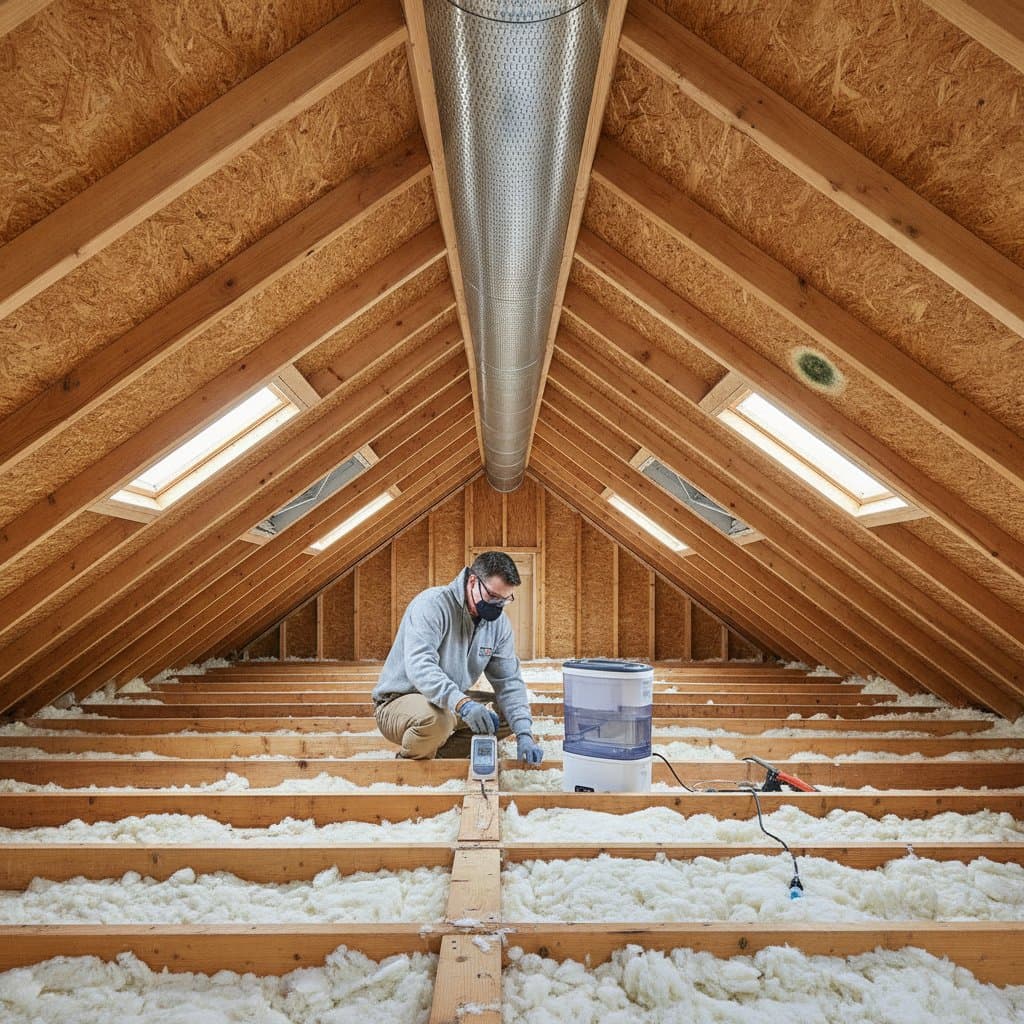
Homeowners should inspect attics during dry weather when moisture levels are lowest. Proper safety equipment includes gloves, safety glasses, and a respirator rated for particulate matter. A stable walking platform placed across ceiling joists prevents falls through drywall.
A bright flashlight reveals details that overhead lighting misses. Inspect the underside of roof decking first, looking for dark spots or water trails. Check areas above bathrooms and kitchens where exhaust fans may create concentrated moisture.
Examine insulation near exterior walls for signs of compression or discoloration. Look for gaps around pipe penetrations, chimney collars, and skylight frames where air leakage occurs. Test vent baffles to ensure they maintain clear airflow channels from soffits to the roof peak.
Small surface mold spots on solid wood may be addressed by homeowners after correcting moisture sources. Extensive growth covering large areas, soft sheathing, or active water intrusion requires professional evaluation before any cleaning attempts.
Ventilation System Improvements
Effective attic ventilation requires balanced intake and exhaust airflow. Soffit vents bring outdoor air into the space while ridge vents, gable vents, or roof vents allow warm, moist air to escape. The system works best when intake and exhaust capacities match each other.
Insulation often blocks soffit vent openings, especially near exterior walls where insulation thickness increases. Plastic or foam baffles installed between rafters maintain clear airflow channels while allowing insulation to fill the remaining space. These baffles extend from the soffit area to several feet up the roof slope.
Roofing professionals can calculate the required ventilation area based on attic square footage and local building codes. Adding powered exhaust fans without addressing intake restrictions may pull conditioned air from living spaces rather than drawing fresh air through soffit vents.
Humidity Control Strategies
Indoor humidity control prevents moisture from reaching the attic in the first place. Bathroom exhaust fans should operate during showers and continue running for 15 to 20 minutes afterward. Each fan requires proper ductwork that extends through the attic to an exterior termination cap with a backdraft damper.
Kitchen exhaust systems need similar attention to duct routing and termination. Repair plumbing leaks immediately and dry any wet materials within 24 to 48 hours. Avoid storing items that may contain moisture, such as wet firewood or damp clothing, in attic spaces.
Target indoor humidity levels between 30 and 50 percent during most seasons. A digital hygrometer provides accurate readings and helps identify when dehumidification may be necessary. Homes in humid climates may require whole-house dehumidification systems during summer months.
Sealing Air Leaks
Air sealing between living spaces and the attic reduces moisture transfer significantly. Apply caulk or expanding foam around electrical wiring penetrations, plumbing pipes, and duct connections. Recessed light fixtures require insulation contact-rated covers before adding insulation around them.
Attic access hatches often leak substantial amounts of air. Weatherstripping around the hatch perimeter combined with additional insulation on top creates an effective thermal and air barrier. Test for air movement by holding a tissue near potential leak locations on cold days.
Cleaning Limited Mold Growth
Surface mold on solid, structurally sound wood can be cleaned after moisture sources are eliminated. Commercial mold removal products designed for wood surfaces provide better results than household cleaners. Always follow product instructions and maintain adequate ventilation during cleaning.
Discard contaminated fiberglass insulation batts, loose cellulose, and any porous materials that show mold growth. These materials cannot be effectively cleaned and may harbor hidden mold colonies. Allow the attic to dry completely before installing replacement insulation.
Professional Assessment Criteria
Several conditions indicate the need for professional mold remediation services. Mold covering more than 10 square feet, soft or damaged roof sheathing, and active water intrusion all require expert evaluation. Homes with occupants who have respiratory conditions or compromised immune systems should avoid DIY mold cleaning entirely.
Professional contractors provide written assessments that identify moisture sources, affected materials, containment procedures, and cleanup methods. Reputable providers address ventilation problems, roof leaks, and humidity control rather than simply removing visible mold growth.
Ongoing Maintenance Practices
Regular roof and attic inspections prevent minor issues from developing into major problems. Check gutters and downspouts after storms to ensure proper drainage away from the foundation. Inspect roof flashing around chimneys, vents, and skylights for damage or separation.
Monitor indoor humidity levels throughout the year, especially during seasonal transitions. Address any new ceiling stains or musty odors promptly before they indicate widespread moisture problems. Schedule professional roof inspections every few years to identify developing issues before they affect the attic space.
Consistent attention to moisture sources, ventilation performance, and humidity control protects both the attic structure and the home's overall air quality. These preventive measures cost far less than structural repairs or extensive mold remediation projects.