Essential AC Maintenance Checklist to Avoid Summer Failures
A malfunctioning air conditioner during peak summer heat transforms a comfortable home into an uncomfortable space. Many homeowners overlook their cooling systems until failure occurs, yet proactive care requires minimal effort. This straightforward checklist identifies potential issues early, averting major repairs and ensuring reliable performance.
The following steps provide a comprehensive routine to maintain efficiency and longevity. Implement these practices seasonally for optimal results.
Importance of Routine AC Care
Air conditioners endure significant stress throughout the cooling season. Accumulation of dust, debris, and component wear gradually diminishes performance. Without consistent upkeep, minor problems escalate, compelling the unit to operate longer for equivalent cooling, which elevates energy consumption and breakdown risks.
Proper maintenance enhances efficiency by up to 20 percent and extends equipment life by several years. Adopting this checklist safeguards comfort while minimizing expenses.
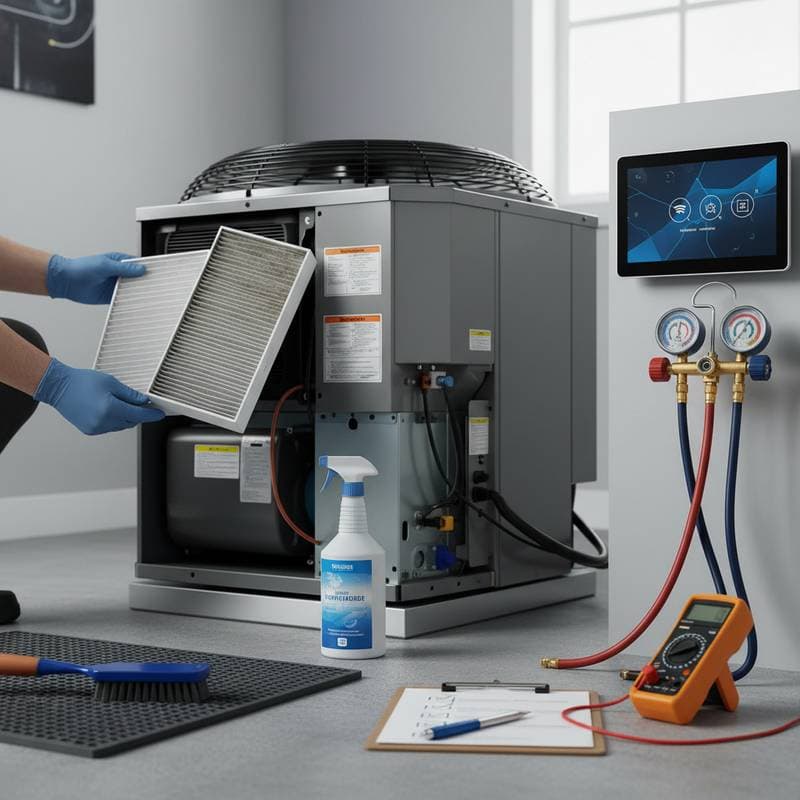
Step 1: Replace or Clean Air Filters
Air filters trap dust and prevent contaminants from damaging internal parts, such as the evaporator coil. Clogged filters restrict airflow, increasing operational strain on the system.
Inspect filters monthly during intensive use and replace them every 60 to 90 days. Standard residential filters measure between 14 by 20 inches and 25 by 30 inches; select replacements that match exactly. Fiberglass options cost 3 to 5 dollars each, whereas pleated or high-efficiency models range from 10 to 40 dollars.
Record the installation date on the filter frame to maintain a regular schedule. Clean filters promote better airflow, ease fan motor workload, and improve indoor air quality.
Step 2: Clean Outdoor Condenser Coils
The outdoor condenser coils dissipate heat absorbed from indoor air. Layers of dust, grass, or pollen on the fins impair heat exchange, reducing overall effectiveness.
Follow these cleaning procedures:
- Disconnect power at the breaker or disconnect box.
- Clear leaves and debris surrounding the unit, ensuring 24 inches of clearance on all sides.
- Brush fins lightly or apply coil cleaning spray, taking care not to bend the delicate metal.
- Rinse gently with water directed from inside to outside using low pressure.
For severe buildup or oily residue, engage a professional technician who employs specialized tools like fin combs for thorough restoration.
Step 3: Examine Refrigerant Lines
Copper refrigerant lines link the indoor and outdoor units, with the larger line insulated to transport cool gas. Deterioration of foam insulation over time exposes lines to environmental damage.
Inspect for cracks, gaps, or absent insulation sections. Repair by installing 3/4-inch foam tubing, fastened with cable ties or adhesive tape. Monitor for frost formation or oil stains, indicators of leaks necessitating expert intervention.
Insufficient refrigerant hampers cooling power and risks compressor failure, a costly component to repair or replace.
Step 4: Unclog the Condensate Drain Line
Cooling air dehumidifies the environment, channeling excess moisture through a PVC drain pipe from the indoor handler. Blockages from algae or sediment can cause water leaks or trigger system halts.
Perform clearing as follows:
- Shut off the system.
- Identify the drain line exiting the indoor unit.
- Attach a wet-dry vacuum to the outdoor end to extract obstructions.
- Introduce one cup of distilled vinegar to inhibit future algae development.
Incorporate this task into seasonal routines to eliminate leak risks and odors.
Step 5: Verify Thermostat Functionality
Inaccurate thermostat readings lead to inconsistent temperatures and unnecessary energy use. Regular checks ensure precise control.
Calibrate by positioning a thermometer adjacent to the device and noting discrepancies; variances exceeding 2 degrees Fahrenheit suggest adjustment needs. Exchange batteries annually before the cooling season begins. Consider upgrading to a programmable or smart model, which optimizes settings during absences to reduce costs by up to 10 percent.
Position the thermostat away from sunlight and drafts to guarantee reliable measurements.
Step 6: Review Electrical Connections and Parts
Loose connections frequently cause erratic cooling. Visual assessments suit homeowners, but internal repairs demand professional expertise.
Conduct a basic inspection for frayed wires, corrosion, or scorch marks near the outdoor disconnect. Professionals perform voltage tests and secure terminals during tune-ups to avert overheating.
Prioritize electrical safety; if irregularities appear, arrange service prior to reactivation.
Step 7: Evaluate System Operation
After completing maintenance, power on the unit and monitor performance.
Allow 10 minutes for stabilization, then assess the temperature differential between return and supply vents, targeting 15 to 20 degrees Fahrenheit. Note any abnormal sounds like rattling or screeching.
Deviations in temperature split may indicate airflow blockages or refrigerant deficiencies requiring further diagnosis.
Safety and Accessibility Guidelines
Individuals with mobility limitations should prioritize accessible tasks, such as filter replacement or indoor vent dusting. Delegate procedures involving attics, ladders, or electrical components to certified HVAC professionals.
Always isolate power sources before work begins, and utilize gloves and protective eyewear when dealing with cleaners or insulation materials.
Pitfalls to Sidestep in Maintenance
Even seasoned homeowners encounter errors in AC care.
Overlook the outdoor unit at your peril, as condenser coils warrant equal attention to indoor filters. Refrain from high-pressure rinsing, which warps fins and obstructs airflow. Annual professional inspections complement DIY efforts, uncovering concealed wear. Maintain 10 inches of clearance before supply vents to prevent furniture from impeding circulation and causing uneven cooling.
Steering clear of these errors supports dependable seasonal operation.
Indicators for Professional Assistance
Seek expert help if airflow weakens post-cleaning, ice appears on lines, unusual noises persist, or energy costs rise despite unchanged settings.
Sustaining Year-Round Reliability
Consistency forms the foundation of breakdown prevention. Schedule spring tune-ups in advance of daily reliance, and maintain a log documenting filter swaps, cleanings, and inspections.
Efficient AC performance yields quieter function, reduced bills, and steady comfort. This checklist equips you to confront summer challenges, preserving coolness without interruptions.


