AC Coil Cleaning: DIY Versus Professional Service Costs
Air conditioner coil cleaning is one of those tasks homeowners often overlook until the system starts struggling to keep the home cool. Dirty coils can raise energy bills, strain the compressor, and shorten the lifespan of the unit. Whether you decide to clean the coils yourself or hire a professional, understanding the costs and process helps you make a smart choice.
Why AC Coils Need Regular Cleaning
The evaporator and condenser coils are responsible for heat exchange inside and outside the home. Over time, dust, pollen, pet hair, and grease build up on the metal fins. Once that happens, the system loses efficiency. The compressor works harder, airflow drops, and the air conditioner takes longer to reach the set temperature.
Industry technicians often say that dirty coils can raise cooling costs by up to 30 percent. That means cleaning them can pay for itself quickly, especially during heavy use seasons. Clean coils also reduce wear on internal components, preventing costly repairs later.
Identifying Dirty Coils and Early Warning Signs
Homeowners can usually spot the signs of dirty coils before a complete system failure. Watch for these issues:
- Warm air blowing from vents even when the system is set to cool
- Ice or frost forming on the evaporator coil or refrigerant lines
- The outdoor unit running longer than normal
- Unusual hissing or clicking noises inside the air handler
- Rising energy bills without a clear reason
When one or more of these symptoms appear, coil cleaning should be scheduled immediately. Waiting too long can cause refrigerant pressure problems or compressor failure.
DIY Coil Cleaning Basics
Cleaning AC coils yourself can save money if done correctly, but it requires patience and proper tools. A standard home cleaning typically involves the following steps:
- Turn off the power. Always disconnect power at the breaker box and the outdoor unit before starting.
- Remove access panels. Unscrew the housing panels to reach the coils. Handle the sheet metal carefully to avoid cuts.
- Use a coil brush. Gently brush away large debris using a soft bristle brush designed for coil fins.
- Apply coil cleaner. Spray a no-rinse or rinse-required coil cleaner evenly across the surface. Let it soak for the time listed on the product label.
- Rinse if needed. For rinse-type cleaners, use a low-pressure garden hose to wash off residue. Avoid high pressure that can bend the fins.
- Straighten fins. Use a fin comb tool to realign bent fins and restore airflow.
- Reassemble and restore power. Replace panels and turn the system back on to test performance.
This process typically takes one to three hours depending on access and how dirty the coils are.
Cost Breakdown for DIY Coil Cleaning
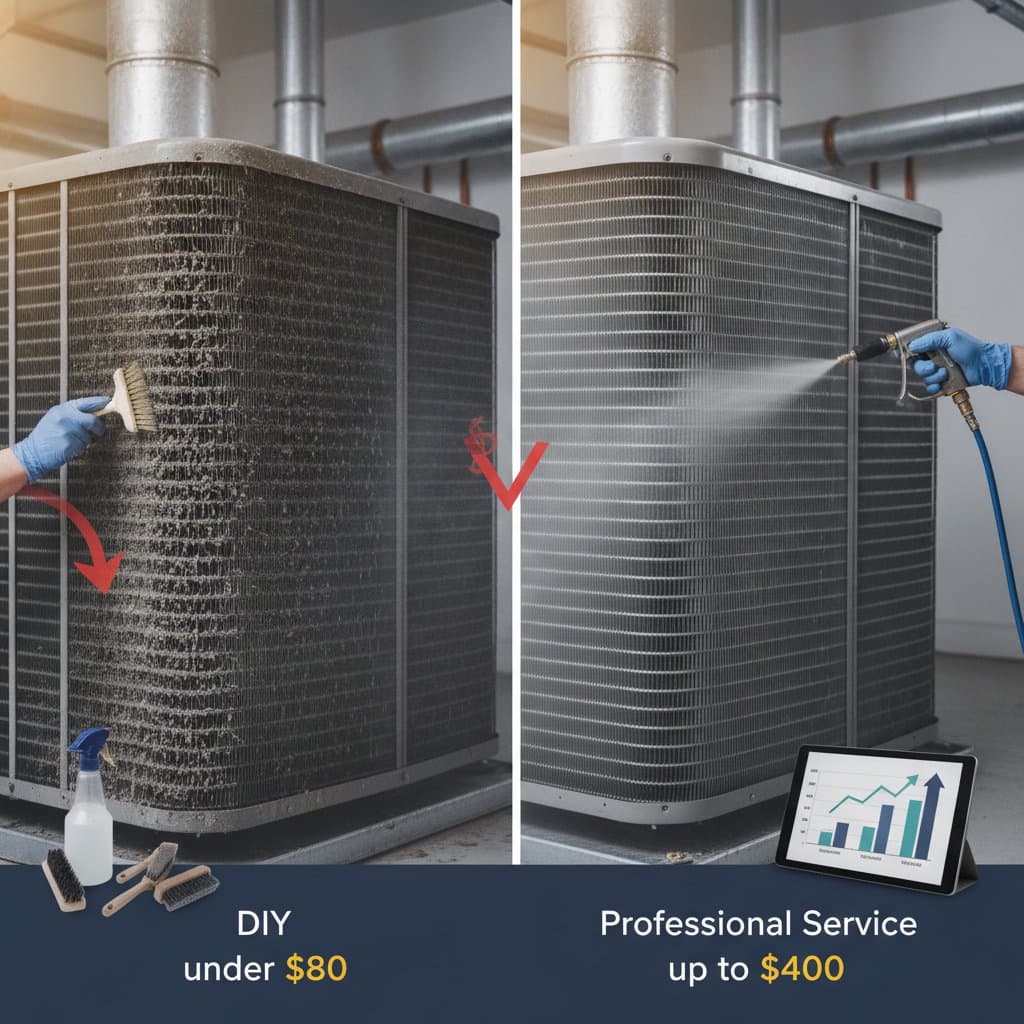
The average homeowner spends between 30 and 80 dollars on DIY coil cleaning materials. Here is a quick breakdown:
- Coil cleaner spray: 10 to 25 dollars per can
- Fin comb set: around 15 dollars
- Soft bristle brush: 10 to 20 dollars
- Protective gear (gloves, goggles, mask): 10 to 15 dollars
If you already own basic tools, the total cost can stay under 50 dollars. The main expense is your time. For experienced DIYers, it is a manageable weekend task. For beginners, it can be tricky to reach the evaporator coil inside the air handler, especially in tight attic or crawl space installations.
Professional Coil Cleaning Costs and What to Expect
A professional AC coil cleaning service usually costs between 100 and 400 dollars depending on coil type, access difficulty, and service package. Technicians often include coil cleaning as part of a full HVAC tune-up, which can add another 100 to 200 dollars but also covers refrigerant checks and airflow testing.
Professional cleaning includes several advantages:
- Deep cleaning tools. Technicians use high-pressure steam or chemical foam systems that remove buildup more effectively than consumer sprays.
- Safety checks. They inspect for refrigerant leaks, corrosion, or damaged fins.
- Time efficiency. A trained technician can complete the job in under an hour.
- Warranty protection. Many HVAC warranties require annual professional maintenance to stay valid.
According to HVAC forums and Reddit discussions, homeowners often report measurable cooling improvement and quieter operation after professional service. This is especially noticeable for systems that have not been cleaned in several years or that run in dusty environments.
Comparing DIY and Professional Cleaning
| Factor | DIY Cleaning | Professional Cleaning |
|---|---|---|
| Cost | 30 to 80 dollars | 100 to 400 dollars |
| Time | 1 to 3 hours | 30 to 60 minutes |
| Skill Level | Moderate | None required |
| Tools Needed | Brushes, cleaner, fin comb | Provided by technician |
| Warranty Impact | May void warranty if damage occurs | Keeps warranty valid |
| Cleaning Depth | Surface-level | Deep, chemical or steam clean |
DIY cleaning works best for homeowners comfortable with basic maintenance and those with easily accessible coils. Professional cleaning is the better option for complex systems, rooftop units, or homes with pets and heavy dust exposure.
Factors That Affect Cleaning Frequency and Cost
Several variables influence how often coils should be cleaned and how much it costs:
- Location: Homes near construction zones, coastal areas, or dusty rural roads accumulate debris faster.
- Filter maintenance: A clogged air filter allows more dirt to reach the coils.
- System age: Older units gather buildup more quickly and may need professional attention twice a year.
- Usage level: Systems that run daily during long cooling seasons benefit from mid-season cleaning.
For most households, cleaning coils once a year is enough. Regular filter replacement every one to three months helps reduce the need for deep cleaning.
When DIY Cleaning Can Go Wrong
Improper cleaning methods can cause more harm than good. Common mistakes include:
- Using high water pressure that bends coil fins
- Applying household cleaners instead of coil-specific products
- Forgetting to disconnect power before spraying
- Failing to rinse off acid-based cleaners completely
- Damaging refrigerant lines while removing panels
Bent fins restrict airflow, and chemical residue can corrode the aluminum surface. If the system shows no cooling improvement after cleaning, or if ice forms on the coils, it is time to call a professional.
Preventing Build-Up Between Cleanings
Simple habits can extend the time between coil cleanings and keep your system efficient:
- Replace air filters regularly
- Keep outdoor units clear of leaves, grass clippings, and dirt
- Maintain at least two feet of clearance around the condenser
- Schedule seasonal inspections to catch minor issues early
- Seal duct leaks to reduce dust movement through the system
These preventive steps can cut energy consumption and help the air conditioner maintain consistent performance throughout the cooling season.
When to Call a Professional
- The evaporator coil is sealed inside the air handler and difficult to reach
- You notice refrigerant leaks or oil stains around the coils
- The system freezes repeatedly after cleaning
- Airflow remains weak despite replacing filters
- You suspect corrosion or mold growth on the coils
Professionals can handle coil removal, deep chemical cleaning, and refrigerant system checks safely. They also verify that the system meets local building codes and manufacturer specifications.
Sustaining Efficient Cooling Performance
Consistent AC coil maintenance keeps your home comfortable while lowering utility costs. Whether you take the DIY route or hire a professional, the key is to stay proactive rather than reactive.
Homeowners who schedule annual coil cleaning often see fewer breakdowns and a noticeable drop in electricity use. With a little upkeep and the right approach, your air conditioner will deliver reliable cooling and steady comfort for years without unexpected repair bills.