Understanding DIY and Professional Fall Chimney Inspections
A well-maintained chimney supports safe and efficient heating during winter months. Homeowners often overlook the need for seasonal checks, yet fall provides the perfect opportunity to address potential problems before the first fire. This guide explores the differences between conducting an inspection yourself and engaging a certified expert, including checklists, costs, and safety measures to inform your decision.
Inspecting your chimney early helps detect issues like blockages or structural weaknesses that could lead to fires, carbon monoxide leaks, or expensive repairs. Whether you choose a hands-on approach or professional assistance, the goal remains the same: ensure reliable performance and family safety.
Core Differences: DIY Versus Professional Approaches
Benefits and Limitations of DIY Inspections
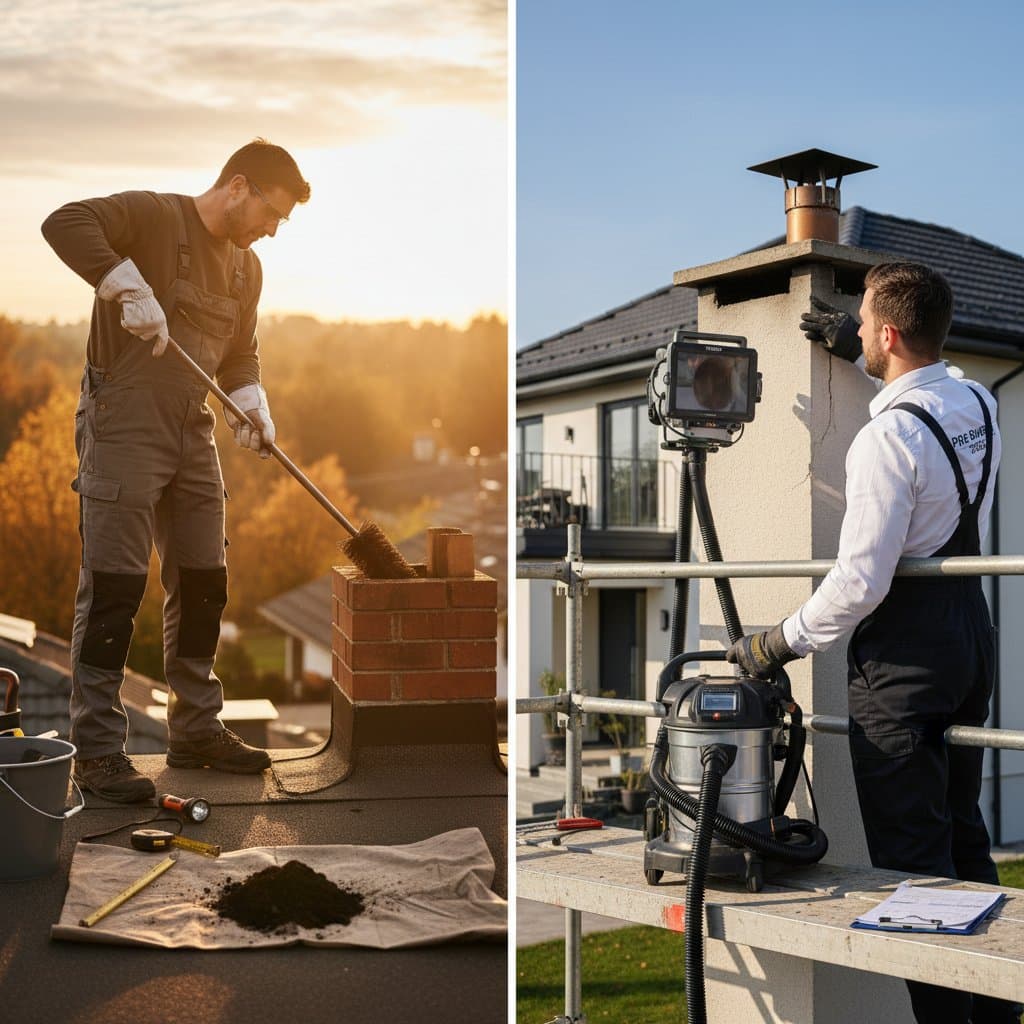
Homeowners comfortable with basic maintenance may opt for a DIY inspection to assess visible conditions without immediate expense. This method requires minimal tools, such as a flashlight, ladder, and mirror, allowing you to spot obvious debris, cracks, or animal nests from the ground or roof edge. Such a check serves as an initial evaluation to determine if deeper intervention proves necessary.
However, DIY efforts fall short in examining internal components like the flue liner or smoke chamber. Without specialized equipment, hidden damage remains undetectable, potentially leaving serious risks unaddressed. View this option as a preliminary step rather than a comprehensive solution.
Advantages of Professional Inspections
Certified chimney professionals employ advanced tools, including high-definition cameras and pressure gauges, to evaluate the entire system thoroughly. Their expertise reveals subtle deterioration, such as micro-cracks or creosote buildup, that amateurs cannot identify. Additionally, they provide detailed reports valuable for insurance claims or home sales.
Expect to pay between $100 and $350 for a standard inspection, with costs varying by chimney height, location, and inspection depth. Many services offer tiered options: a basic visual exam, a detailed internal scan, or a full system analysis. This investment often uncovers problems early, saving thousands in future repairs.
DIY Fall Chimney Inspection Checklist
For those pursuing a self-guided check, follow these steps to cover essential exterior and accessible areas safely. Gather tools in advance and work on a dry, calm day to minimize risks.
-
Examine the Chimney Crown: Climb a stable ladder to inspect the top concrete slab for cracks or erosion. Seal minor fissures with high-temperature caulk, but note larger damage for professional review.
-
Check the Flashing and Chimney Base: Look for gaps where the chimney meets the roof. Ensure metal flashing remains intact and sealed to prevent water entry; apply roof cement to small separations if needed.
-
Inspect Bricks and Mortar: Scan for spalling bricks, crumbling mortar, or efflorescence, which signals moisture issues. Document any loose elements and avoid climbing higher if instability appears.
-
Clear Debris from the Firebox: Open the damper and use a flashlight to view the firebox interior for soot, ash, or blockages. Gently sweep out loose material with a brush, wearing protective gear.
-
Test the Damper Operation: Ensure the damper opens and closes smoothly without sticking. Lubricate hinges if they resist movement.
-
Observe for External Signs: From the ground, check for leaning structures, bird nests, or vines climbing the exterior, which could obstruct airflow.
Limit your inspection to what you can reach safely; if any step reveals concerns, schedule a professional follow-up immediately.
Professional Fall Chimney Inspection Checklist
Experts perform in-depth assessments using industry-standard protocols from organizations like the Chimney Safety Institute of America. They access hard-to-reach areas and quantify issues for precise recommendations.
-
Flue Liner Evaluation: Insert a camera to detect cracks, spalling, or relining needs in the flue. Damaged liners pose fire hazards; repairs range from $500 for basic patches to $5,000 for full replacements.
-
Smoke Chamber Analysis: Probe for excessive soot, rough parging, or structural weaknesses that impede gas flow. Smoothing these areas enhances draft and reduces creosote formation.
-
Draft and Airflow Measurement: Use manometers to gauge pull strength. Poor draft may necessitate extensions, caps, or liner adjustments to optimize performance.
-
Masonry Integrity Check: Assess bricks, mortar joints, and waterproofing for deterioration. Tuckpointing costs $8 to $12 per square foot and prevents water penetration.
-
Moisture Detection: Employ meters and infrared imaging to identify leaks in walls or flashing. Early intervention avoids rot in surrounding framing.
-
Appliance and Connector Verification: Confirm seals on fireplaces, stoves, or inserts align with venting codes. Faulty setups risk backdrafts or overheating.
Professionals often include cleaning services, removing up to an inch of creosote to meet safety standards.
Essential Safety Protocols for Any Inspection
Safety forms the foundation of chimney work, whether DIY or professional. Adhere to these guidelines to protect yourself and your property.
Roof and Ladder Precautions
Select a fiberglass ladder rated for your weight and secure it with ties or stabilizers. Avoid working alone, and descend immediately if wind picks up or surfaces slicken.
Personal Protective Equipment
Don nitrile gloves, N95 respirators, and goggles to shield against dust and irritants. Cover skin fully to prevent creosote exposure, which causes respiratory and dermal issues.
Fire and Ventilation Measures
Allow 48 hours after the last use for the chimney to cool completely. Ventilate the area by opening windows and doors; install carbon monoxide detectors nearby as a precaution.
Hiring Qualified Experts
Verify certifications from the Chimney Safety Institute of America and confirm liability insurance. Reputable firms contain debris during work to avoid indoor mess.
Resolving Typical Chimney Issues
Addressing problems promptly maintains system reliability. Use these targeted solutions for common concerns.
Improving Weak Draft
If smoke spills into the room, preheat the flue with a portable heater or twisted newspaper ignited at the base. Ensure exterior caps allow sufficient air intake without restrictions.
Repairing Water Intrusion
Trace stains to faulty flashing or crown cracks; apply elastomeric sealant for temporary fixes. Persistent leaks demand professional reconstruction to halt erosion.
Eliminating Unwanted Odors
Creosote or moisture causes persistent smells; professionals apply bio-enzymatic cleaners post-sweep. Maintain dryness with chimney caps to deter nesting pests.
Addressing Brick Deterioration
Spalled surfaces result from freeze-thaw cycles; apply silane-siloxane sealers annually. Replace severely damaged sections to restore stability.
Steps for Ongoing Chimney Preservation
Regular upkeep extends your chimney's life and enhances home value. Schedule annual professional inspections and perform quarterly DIY visuals. Invest in rain caps and chimney mounts to shield against weather extremes. By staying proactive, you ensure safe, efficient fireside enjoyment for years ahead.