The Ideal Fall Schedule for Lawn Aeration and Overseeding
A vibrant lawn demands attention to seasonal rhythms, and fall stands out as prime time for aeration and overseeding. Warm soil encourages root development while cooler air limits weed competition, setting the stage for robust grass growth. Homeowners who align these tasks with environmental cues, particularly soil temperature, can correct compaction, fortify roots, and cultivate a denser turf that emerges strong in spring.
Timing holds the utmost importance, as aeration and overseeding performed off-mark can hinder seed establishment or invite winter damage. By monitoring soil conditions and selecting appropriate tools, you maximize the impact of your efforts, whether handling the project personally or engaging experts.
Why Soil Temperature Drives Fall Aeration Success
Soil temperature serves as the primary indicator for aeration timing, influencing seed germination and root penetration. Ideal conditions fall between 55 and 65 degrees Fahrenheit, when the ground retains summer warmth to spur growth but begins cooling to reduce stress on emerging seedlings. Temperatures above 70 degrees risk drying out seeds before they root, while below 50 degrees slow metabolic processes, delaying recovery until spring.
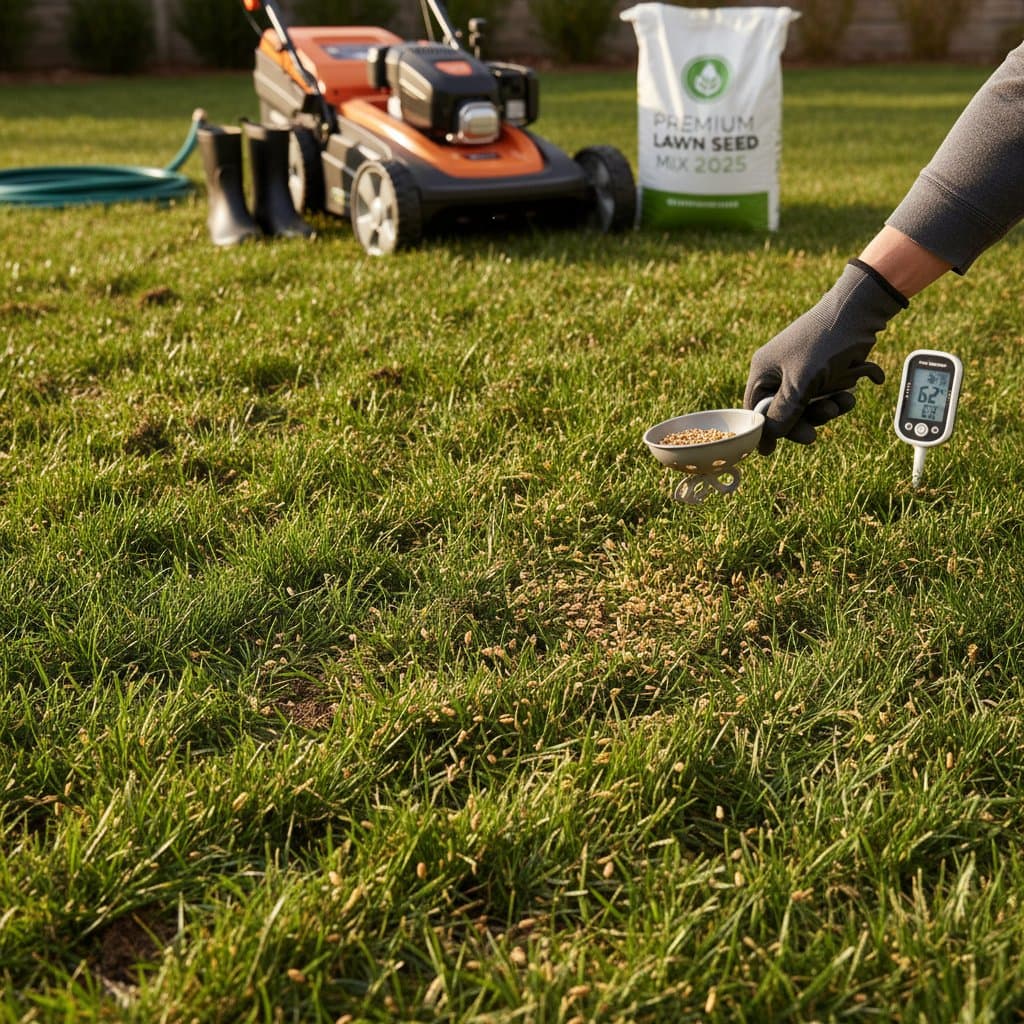
To measure accurately, insert a soil thermometer four to six inches deep in multiple yard spots early morning, when readings stabilize. Track local weather patterns or use online soil temperature maps for your region to pinpoint the window, typically mid-September to early November for most cool-season grasses. This data-driven approach ensures aeration cores penetrate effectively and seeds access moisture without frost interference.
Step-by-Step Guide to Aeration and Overseeding
Approach these tasks sequentially to create an optimal environment for lawn renewal. Begin with assessment and preparation, then execute aeration followed by seeding, and conclude with vigilant aftercare.
Step 1: Evaluate Your Lawn's Needs
Examine the turf for compaction indicators like uneven growth, water runoff instead of absorption, or bare patches from heavy use. Probe the soil with a screwdriver; if it resists entry beyond two inches, compaction persists. Clay-heavy or high-traffic areas warrant annual treatment, whereas sandy soils may require it biennially to maintain drainage and nutrient flow.
Consider your grass variety: cool-season types like Kentucky bluegrass and perennial ryegrass thrive in fall's moderate conditions, while warm-season Bermuda or zoysia benefit from earlier intervention to establish before dormancy.
Step 2: Select the Optimal Timing Window
Target days with air temperatures between 60 and 75 degrees Fahrenheit and soil at the 55-65 degree sweet spot. Ensure the ground holds moisture without saturation; irrigate lightly if dry to facilitate aerator tines. Avoid periods of extreme weather, such as prolonged rain that could wash away seeds or drought that hardens the earth.
For regional precision, northern climates often align with late September, while southern areas extend into November. Confirm soil readiness by walking the lawn; it should yield slightly underfoot but not puddle.
Step 3: Perform Aeration Correctly
Aerate prior to overseeding to open pathways for seeds and air. Rent or purchase a core aerator that extracts cylindrical plugs, targeting depths of two to four inches to alleviate compression without merely displacing soil.
Pass over the area in two perpendicular directions for thorough coverage, spacing holes four inches apart. Collect and leave plugs on the surface to decompose, enriching the soil with organic matter over weeks. This method enhances water infiltration by up to 30 percent and promotes deeper root systems.
Step 4: Overseed for Full Coverage
Proceed to seeding on the same day to capitalize on fresh holes. Calculate seed needs based on lawn size—typically five to ten pounds per 1,000 square feet for thin areas—and distribute uniformly using a drop or broadcast spreader.
Gently rake seeds into the cores for soil contact, then apply a thin topdressing of compost if desired to retain moisture. Choose varieties matching your existing turf, such as a fine fescue blend for shade tolerance, to ensure seamless integration and uniform vigor.
Step 5: Implement Aftercare Practices
Initiate watering right after seeding, providing one-quarter inch daily to maintain surface dampness for 14 to 21 days until germination. Transition to deeper, less frequent applications once sprouts appear, aiming for one inch weekly to encourage root depth.
Fertilize lightly with a starter formula high in phosphorus to support establishment, and delay mowing until new growth reaches three inches. Set blades high and sharpen them to avoid tearing tender blades, removing no more than one-third of the height per session.
Weighing DIY Against Professional Services
Decide on execution based on your resources and expertise. Both paths yield strong results when timed with soil temperature in mind, but each carries distinct considerations.
Benefits and Challenges of DIY Aeration
Opt for self-managed work if you seek cost savings and hands-on control. Renting a powered aerator costs 50 to 100 dollars per day, plus seed and supplies, offering flexibility to fit your schedule.
However, the physical demands can exhaust, and inexperience may lead to shallow plugs or missed spots. Practice on a small test area first to build confidence and achieve even results.
Advantages of Hiring Professionals
Professionals bring specialized machinery and knowledge, often completing large yards in hours with precision that rivals DIY efforts. Expect fees of 75 to 150 dollars per 1,000 square feet, including aeration, seeding, and initial fertilization.
This choice minimizes errors, such as over-aerating sensitive areas, and frees your time for other tasks. Seek providers experienced in your grass type for tailored recommendations.
Factors to Guide Your Choice
-
Inspect the yard scale: Small lots under 5,000 square feet suit DIY, while expansive ones favor pros.
-
Gauge your readiness: If unfamiliar with equipment, observe tutorials or start small.
-
Tally expenses: Factor rentals, fuel, and labor against service bids for true comparison.
-
Weigh potential pitfalls: Professionals mitigate risks like utility damage or inconsistent depth.
-
Align with goals: Select the method promising the best soil temperature-timed outcome within your constraints.
Essential Preparations for Success
Build a solid foundation by addressing these elements ahead of execution.
-
Analyze your soil type and pH through a home test kit; amend acidic areas with lime if below 6.0.
-
Locate and flag irrigation lines, cables, and trees to steer clear during aeration.
-
Mow to two inches height and remove clippings or thatch buildup exceeding half an inch.
-
Schedule within a seven-day span to link aeration and seeding seamlessly.
-
Stock supplies: thermometer, aerator, spreader, seed, and mulch for post-treatment protection.
Sustaining Lawn Health Year-Round
Fall efforts lay the groundwork, but ongoing practices amplify benefits. Monitor soil temperature in spring for follow-up aeration if needed, and integrate summer dethatching to prevent recurrence of compaction. Consistent fertilization and moderate traffic preserve the gains, delivering a lawn that withstands seasonal shifts and delights with enduring green.